I posted this today on Fuel My Blog’s Blog. I thought you folks here might enjoy reading it here.

As a blogger I am always on the lookout with how to interact with my readers. I have the ability to send automatic e-mail comments back to people who have commented on my posts. That only works on my WordPress self hosted blog however.
This past week I ran across a great website that looks like a fun way to engage your audience. I learned about this from Fuel My Blog’s Monday Madness writer,Princesse Ecossaise. The site is called Voice Thread and it allows your readers to leave you voice messages on pictures or videos that you have uploaded.
Signing up for Voice Thread is totally free and all you would need in addition to your internet connection is a microphone. I picked up a cheap one at Target for $9.00, it is on a little boom and the top part can be removed and plugged into the microphone plug on your laptop too. I experimented with a Voice Thread of my own with some photos that I took last week and though to myself, I am going to make this a weekly feature. I take a Photo-A-Day so why not take the past week’s photos (Sunday – Saturday) and make a voice thread out of them. So that is what I am going to do and I am going to show you how to create your own.
First create a Voice Thread Account. Go to http://voicethread.com click on Register, and just put in your name, e-mail address and password. Your e-mail address and password will be what logs you into the service.
Once logged in you can tool around and see what you can find from other people and add your comments, you can also add friends to your network. I added Princesse Ecossaise because she rocks, don’t believe me, read her blog, it is some funny stuff. But what we are really here for today is to create.
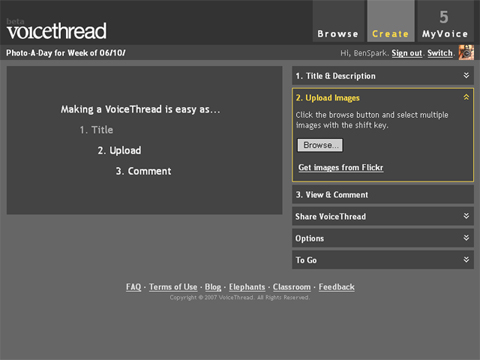
Click the Create Button. You are brought to step #1.
Title & Description – Give your Voice Thread a Title and a Description so people would be interested in watching and listening to it, and what you ultimately want are comments on it too. You can also add tags, (the internet is one big game of Tag isn’t it?)

Step 2 is where you Upload Images. If you have a Flickr Account it is very simple, you can add images from your sets with ease. It isn’t that easy to load individual images that are not in sets, I am a huge fan of Flickr and so have a pro account so I have many sets, it is totally worth the money.
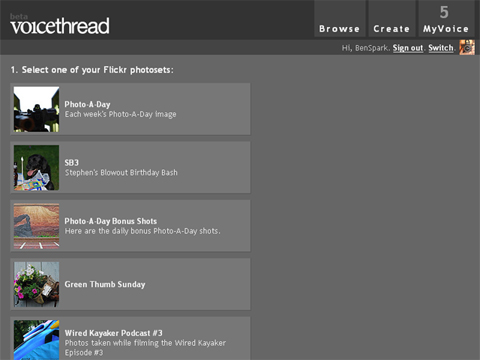
So if you choose to get your images from Flickr first you have to authorize voice Thread to connect to your Flickr account, after that initial authorization you can go back over and over. You can also browse to images on your own computer and upload them.
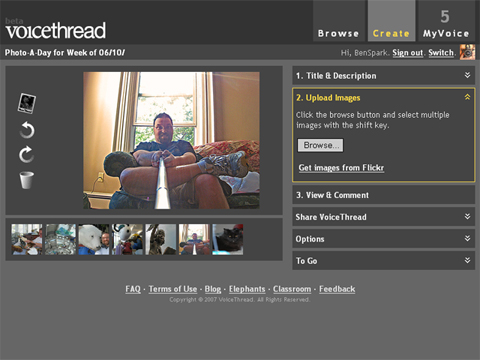
Once the images have been imported. you are taken to a screen where you can rotate the image, Add a title and link to each image or discard an image. You can also set the sort order of your images. My images came in in a reverse order so I reordered them.
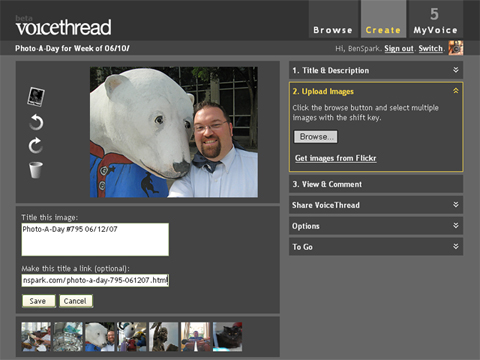
I am also going to add a title and link to each one. The title will be Photo-A-Day # and the link will be to the post on my blog for the image. Since I title all my images for Photo-A-Day as Photo-A-Day # + Date, I know that I can easily change the link each day by changing a few numbers.
Once that is done, I move to Step 3 the View & Comment Stage. Here I can select one of my images, and then select Record or type. I can also choose to type a comment for the image, so if I wanted to type something about image I could, the words appear over my little avatar on the left. Typed words are recorded and play in sequence. So if you choose Record first then your voice post will go first then the typed message or vice versa, and you can record as many voice posts on each images as you want and type as many messages as you want as well. Another option when you click type is annotate, you can click a little colored circle and choose that color, then you can draw on the image. So if you wanted to emphasize something you could easily do so.
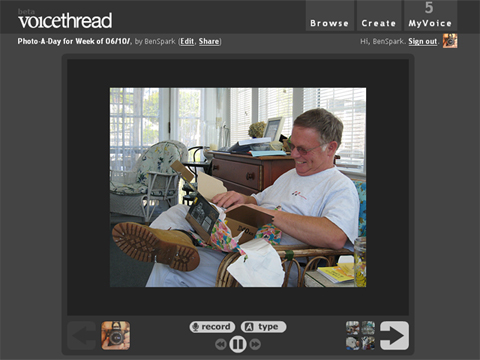
Recording voice, Get your microphone ready, click on the record button and start talking. Once you are done you can review what you just said and decide to keep the recording or trash it. While you are recording you can also annotate the image. So if you are multi talented and a multi-tasker you can do these things at one time.
Recording is simple, select an image, click record and talk away. Then click stop recording. You can chose the arrow on the far bottom right of the control screen to move to the next image or you can click on the group of four images at the bottom right to see all the images at your disposal and choose whichever one you want.
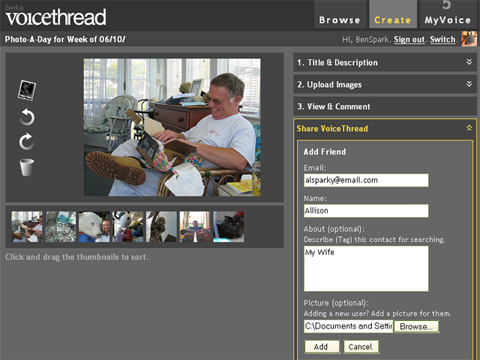
Once you have recorded all of your voice commentary for each image then it is time to Share your voice thread. You can send this thread directly to friends and family and ask them to participate in the voice thread. A Voice Thread is like a conversation that you can have with friends and family to reminisce about a family photo or event, reminisce with friends about a party or social outing or engage with your blog audience. You can make Voice Threads private so just your friends and family can comment on it.
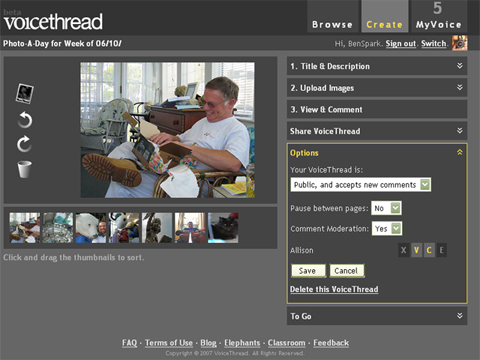
The next is the Options settings. You can set options on each of your friends and your commentors as well. You can grant a friend access to view, Comment or edit, if you choose edit that other person becomes a co-editor of your voice thread. This is great for collaborative work. You can also decide to moderate comments and you can decide whether or not to all
ow a pause between each image. If you want your voice thread to move quickly then don’t allow a pause between pages.
Here is the Voice Thread I just created for this Tech Tuesday post.
You can share your Voice Thread via a link, or to a large version 800 X 600 or small 480 X 360 tht you can add to your blog, and you can even get code to add your voice thread to you MySpace account.
Viewing a Voice Thread, when you are viewing a Voice Thread you can zoom in on the picture and scroll around to see it in larger detail. Just click on the image to zoom and when you are zoomed in move your mouse around to view different areas of the image. Clicking again will zoom you back out.

Experiment! I would love to see people sign up and add their own comments to this Voice Thread. Go ahead, check it out, add one o your blog, get your readers talking and engaging in conversations on your blog.
BenSpark Writes four blogs, is an avid kayaker and a Transformers fan, he also takes at least one photo every single day and posts it to his BenSpark Blog. You can visit him at The BenSpark, BenSpark 2: Electric Boogaloo, Flatwater Tech or The Wired Kayaker.