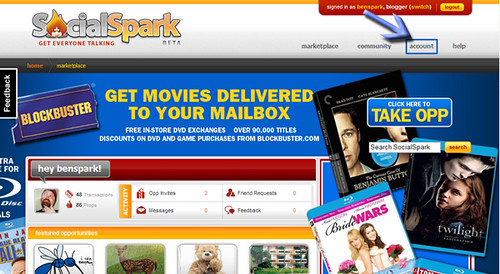
Occasionally I get questions from members of the “I’m Not A Famous Blogger” IZEA Insider Crew and sometimes they are just perfect for answering on a SocialSpark Saturday post. So with permission and little patience I asked the person who asked this question below if I could save the answer till today. Here is the question.
“don’t have any idea what I am doing. I tried a CPC today and I am not sure if I did it right. I copied the cost and posted it on my twitter page. I guess what I need is a tutorial. Is there somewhere I can find this information or can you help me? I appreciate any help you can offer.”
I’m going to assume that this person mean “code” instead of “cost”. So let’s start from the beginning. If you recall from my post “How Do I Make Money From SocialSpark” post on July 4th I talked about the different ways in which a user can make money with SocialSpark. One such was is through CPC or (Cost Per Click) opportunities. Usually the cost per click is anywhere from .11 a click to .68 a click. Here is what I said about Cost Per Click in that post.
“… the Cost Per Click opportunities give you various Ad units to use. However with Cost Per Click you are paid when someone clicks the link that you post through your blog, Twitter, or Facebook. You can do a pretty decent amount of money by posting a few links in various places.”
How do you do this right?
I find CPC to be one of the easiest ways of making a little money on SocialSpark because of the simplicity of what your readers need to do. All they need to do is click. You have various ways to get them to do this. Let’s Take a Look at one of the CPC opps from SeaWorld. This one has been pretty good to me without me doing much at all. That is a great thing about CPC opps because you can be active or passive.
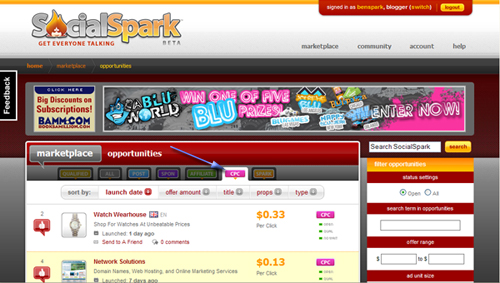
Here is the typical CPC Opp screen.

Let’s break this down to the components. First is the offer detail area. This is where the advertiser tells you about the campaign and offers you ideas about why readers would like to click the links or visual ad units.

The next section is the Additional Info section. This is where you see what you will be paid per click, the landing page, what you have made so far, how many people have seen your links and so on. Take a look and I’ll break that down too.

If we go from left to right you can see first Conversion info. This tells the blogger the name of the campaign, how much each click is worth and gives a link to the landing page. As we move across the image we see the Opportunity Stats section. This section tells you the start and stop dates of the campaign. The stop date is subject to change. A couple reasons for the stop date to change would be if the campaign runs out of money or if the campaign goals are achieved. Below that there may be additional requirements, for instance this opp is for English only blogs. Then there are other requirements like RealRank and blogger location. Advertisers can use blogger demographics to help target the area where the blogger’s readers are most likely from.
The section at the far right is where you see your conversion stats. As you can see I’ve made little under $5.00 in this campaign so far. Below that I can see how many people have viewed the links I have posted and how many people have actually clicked. Below that are invalid clicks. SocialSpark uses Click Forensics to determine if clicks are valid or invalid. This was a bit dodgey early on and many clicks were seen as invalid especially on Twitter. This has since become much better and more accurate. Below the invalid clicks is the area of Pending. These are clicks that will most likely convert to accurate clicks.
So, how do you get the links so people can start clicking? That is where the next section, Ad Units comes in. The Ad Units section is where you can see the types of valid links that the advertiser has made available. In this case SeaWorld has decided to use a Text Link, Twitter, Facebook, A Leaderboard (Great for RSS Feed), and a Larger Ad Unit box. Also at the bottom is the Disclosure Badge. Take a look at this close up. Notice that the Leaderboard is what has generated me the most clicks so far.

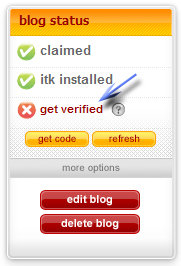
With the Text Link there are two ways to use Text Link in your posts. You would click the Get Code button on the far right and a screen will pop up.

You can copy and paste the code with the view tracking embedded in it like this ![]() Visit Busch Gardens or Aquatic free?. This is good because it gives you the wording that the advertiser wants to use. The other option is to grab the Link Only code and attach that to keywords that you would use instead. For example if I wanted to say Buy a SeaWorld Ticket Get a Free Busch Gardens or Aquatica Ticket Free!
Visit Busch Gardens or Aquatic free?. This is good because it gives you the wording that the advertiser wants to use. The other option is to grab the Link Only code and attach that to keywords that you would use instead. For example if I wanted to say Buy a SeaWorld Ticket Get a Free Busch Gardens or Aquatica Ticket Free!
Did you notice that the first link looks a little odd. There is space all around it. I cannot figure out if I need to set my CSS to make that look normal or if that is because of the tracking image. I generally don’t take option one because of that very design issue. If anyone can help me make those look better I’d certainly use the link with view tracking embedded more often.
The next type of Ad Unit for this campaign is the Twitter One. When you click the Get Code button a screen pops up with the code for you to copy and paste into your tweet.

As you can see there is a very important message to this Get Code. Each tweet must have the #spon tag that discloses that the tweet is a sponsored tweet. Blogging or Tweeting or Facebooking without disclosure is against the SocialSpark Code of Ethics.
My personal take is don’t forget to disclose on every thing. If you do not disclose then you are deceiving your audience and making SocialSpark look bad. SocialSpark is for the ethical blogger please be aware of how you are a representative of SocialSpark in your blogging, tweet, etc.
So what does a tweet look like with the code and #spon tag in it.

So you can see that I put my own personal spin on the campaign and I made sure to put the #spon hashtag plus the link for the Get Code box. This sort of campaign is very similar to the one that you can do for Facebook. You can click the Get Code button for a Facebook link and a box will pop up with the correct link code.

You take that link and then post it into facebook. You will be presented with a catchpa (sp) to determine that you are not a robot. From there you have write your post and with facebook you have more space to get your message across. Depending upon the link you might even be able to choose a thumbnail. Remember that #spon tag in Facebook as well. Here is an example of adding a sponsored link into Facebook. I had to use another campaign, this one for the Rock Band Alaska.

Other Ad Units are more visual and they can be many different sizes, for example if you see the top right hand side of my blog you will see some 125 X 125 ads, these are everywhere and they could be CPC, CPA, or Affiliate links. In this campaign that I’m talking about with SeaWorld they have decided to use the Leaderboard size which, as I stated earlier is great for your RSS feed. I use the Plug in RSS Footer. This lets me swap out different campaigns at the bottom of my feed. I make sure that I disclose on this as well. I state “Do you Like BenSpark.com? Help support it by supporting my sponsors.” This gets a few clicks here and there and for this particular SeaWorld opp it has done very, very overall. Here is an example of of my RSS Feed Footer.

And to get the code for each of these visual ad units once again you click the Get Code button on the right hand side. Each visual unit will tell you the dimensions of the image so you know where to post it on your blog. Just copying and pasting this code into your blog posts is very easy. Here is an example of what the copy code pop up looks like.

And this is an example of one of the visual Ad Units for the SeaWorld & Busch Gardens & Aquatica CPC campaign.

Probably the most important thing with each of these campaigns is disclosure and if you are writing a blog post about a particular campaign like I am right now you are going to use a SocialSpark Disclosure Badge. I have one at the bottom of this post. You can easily chose the color of the badge that you’d like to use. Here is an example of what the code box for that looks like. See how you can select the color from the drop down menu and then copy the code.
So that is it, that is how to use the CPC opportunity on SocialSpark. This of course is a simple way to use the campaigns. “I’m Not A Famous Blogger” IZEA Insider Crew Member DragonBlogger has done a pretty successful CPC campaign that he details in his post Most Successful SocialSpark CPC To Date. He takes this instructional post and goes way beyond in how to effectively make money from a CPC campaign.
![]()